
 As you may have garnered from the radio silence that blanketed the blog for week-long periods this summer, in July and August I solo taught my first self-designed course. Now, at this point in my academic career, I have a lot of teaching experience under my belt. I’ve acted as a graduate student instructor for Human Evolution, Human Behavioral Ecology, Introduction to Biological Anthropology, Primate Social Behavior and Nutrition and Human Evolution. I am eminently comfortable standing in front of students and talking about anything anthropology-related. However, my first time teaching my own course was still an academic milestone, and I was pretty jazzed to (a) finally teach some osteology, and (b) experiment with a few unconvential teaching methods.
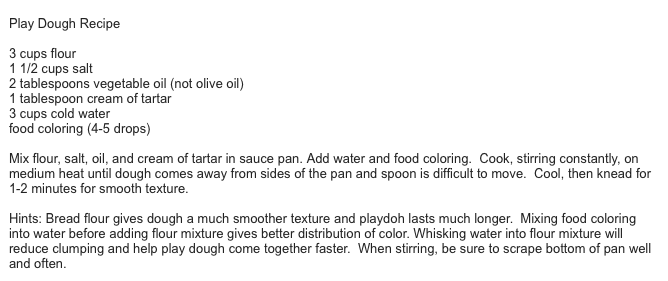
Despite my aptitude for coming up with creative approaches to teaching human skeletal anatomy, I can’t claim credit for the playdoh idea. I first heard about it at the American Association of Physical Anthropologists meetings in St. Louis last spring, when I visited Kristina Killgrove and Andrea Acosta‘s poster, titled “Twerking, Limericks, and 3D Printing: Shaking Up Human Osteology Assignments“. I was intrigued by the possibility of getting students to do something so hands-on, and after striking up a conversation with Kristina about the feasibility of such a project, decided to go for it. Kristina kindly shared her go-to recipe for play-doh (provided by an accomodating kindergarten teacher), and I set to work:
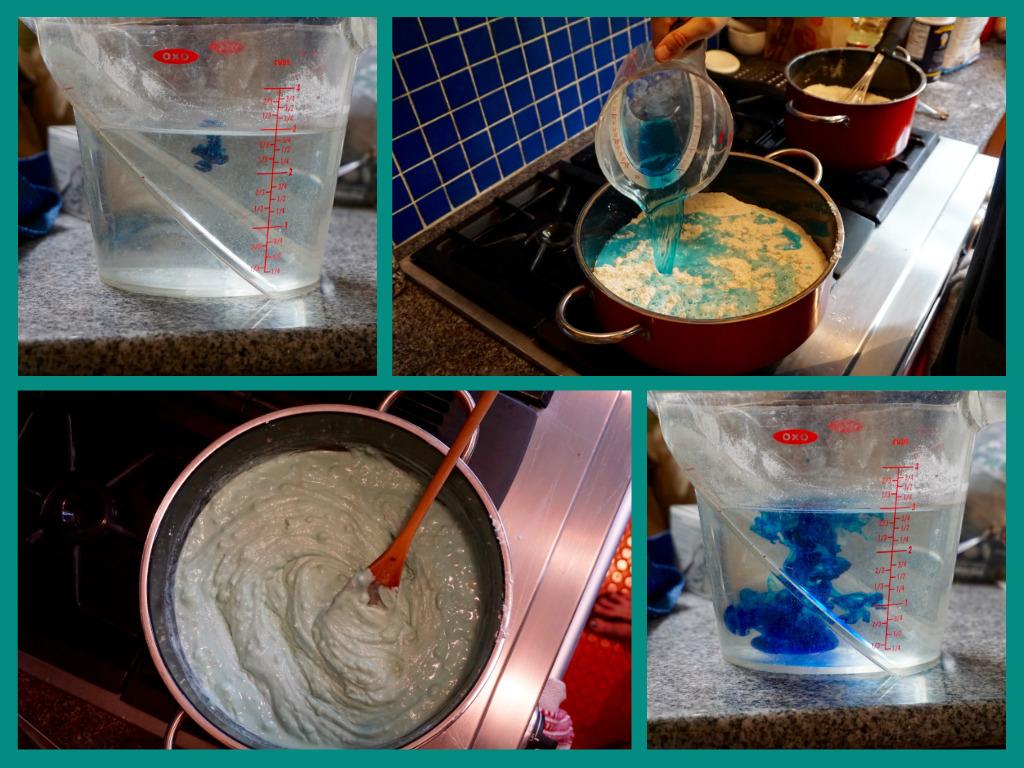
I knew that I would need to make enough play-doh for 17 students, and so I wound up making four batches, using the recipe above. Here’s a step by step guide to what the playdoh should look like at each of the different stages:

This play-doh recipe produces a product of exactly the same consistency (and smell) as the factory made stuff. I tested out the assignment before asking my students to use this to model bones, and it works pretty well, though intricate three-dimensional pieces will be prone to collapse.
I made three blue batches and one red batch, using the food-coloring that you can buy in most grocery store bakery aisles. This turned out to produce an ample amount for my class, and I think I could have easily gotten away with only three batches. To give you some idea of the volume the recipe produces, one batch produces this much ‘doh (Note: For scale, I am 5″4 on a good day):

If you find yourself captivated by the possibility of using play-doh in your own courses, here are the first two activities I piloted this past summer.
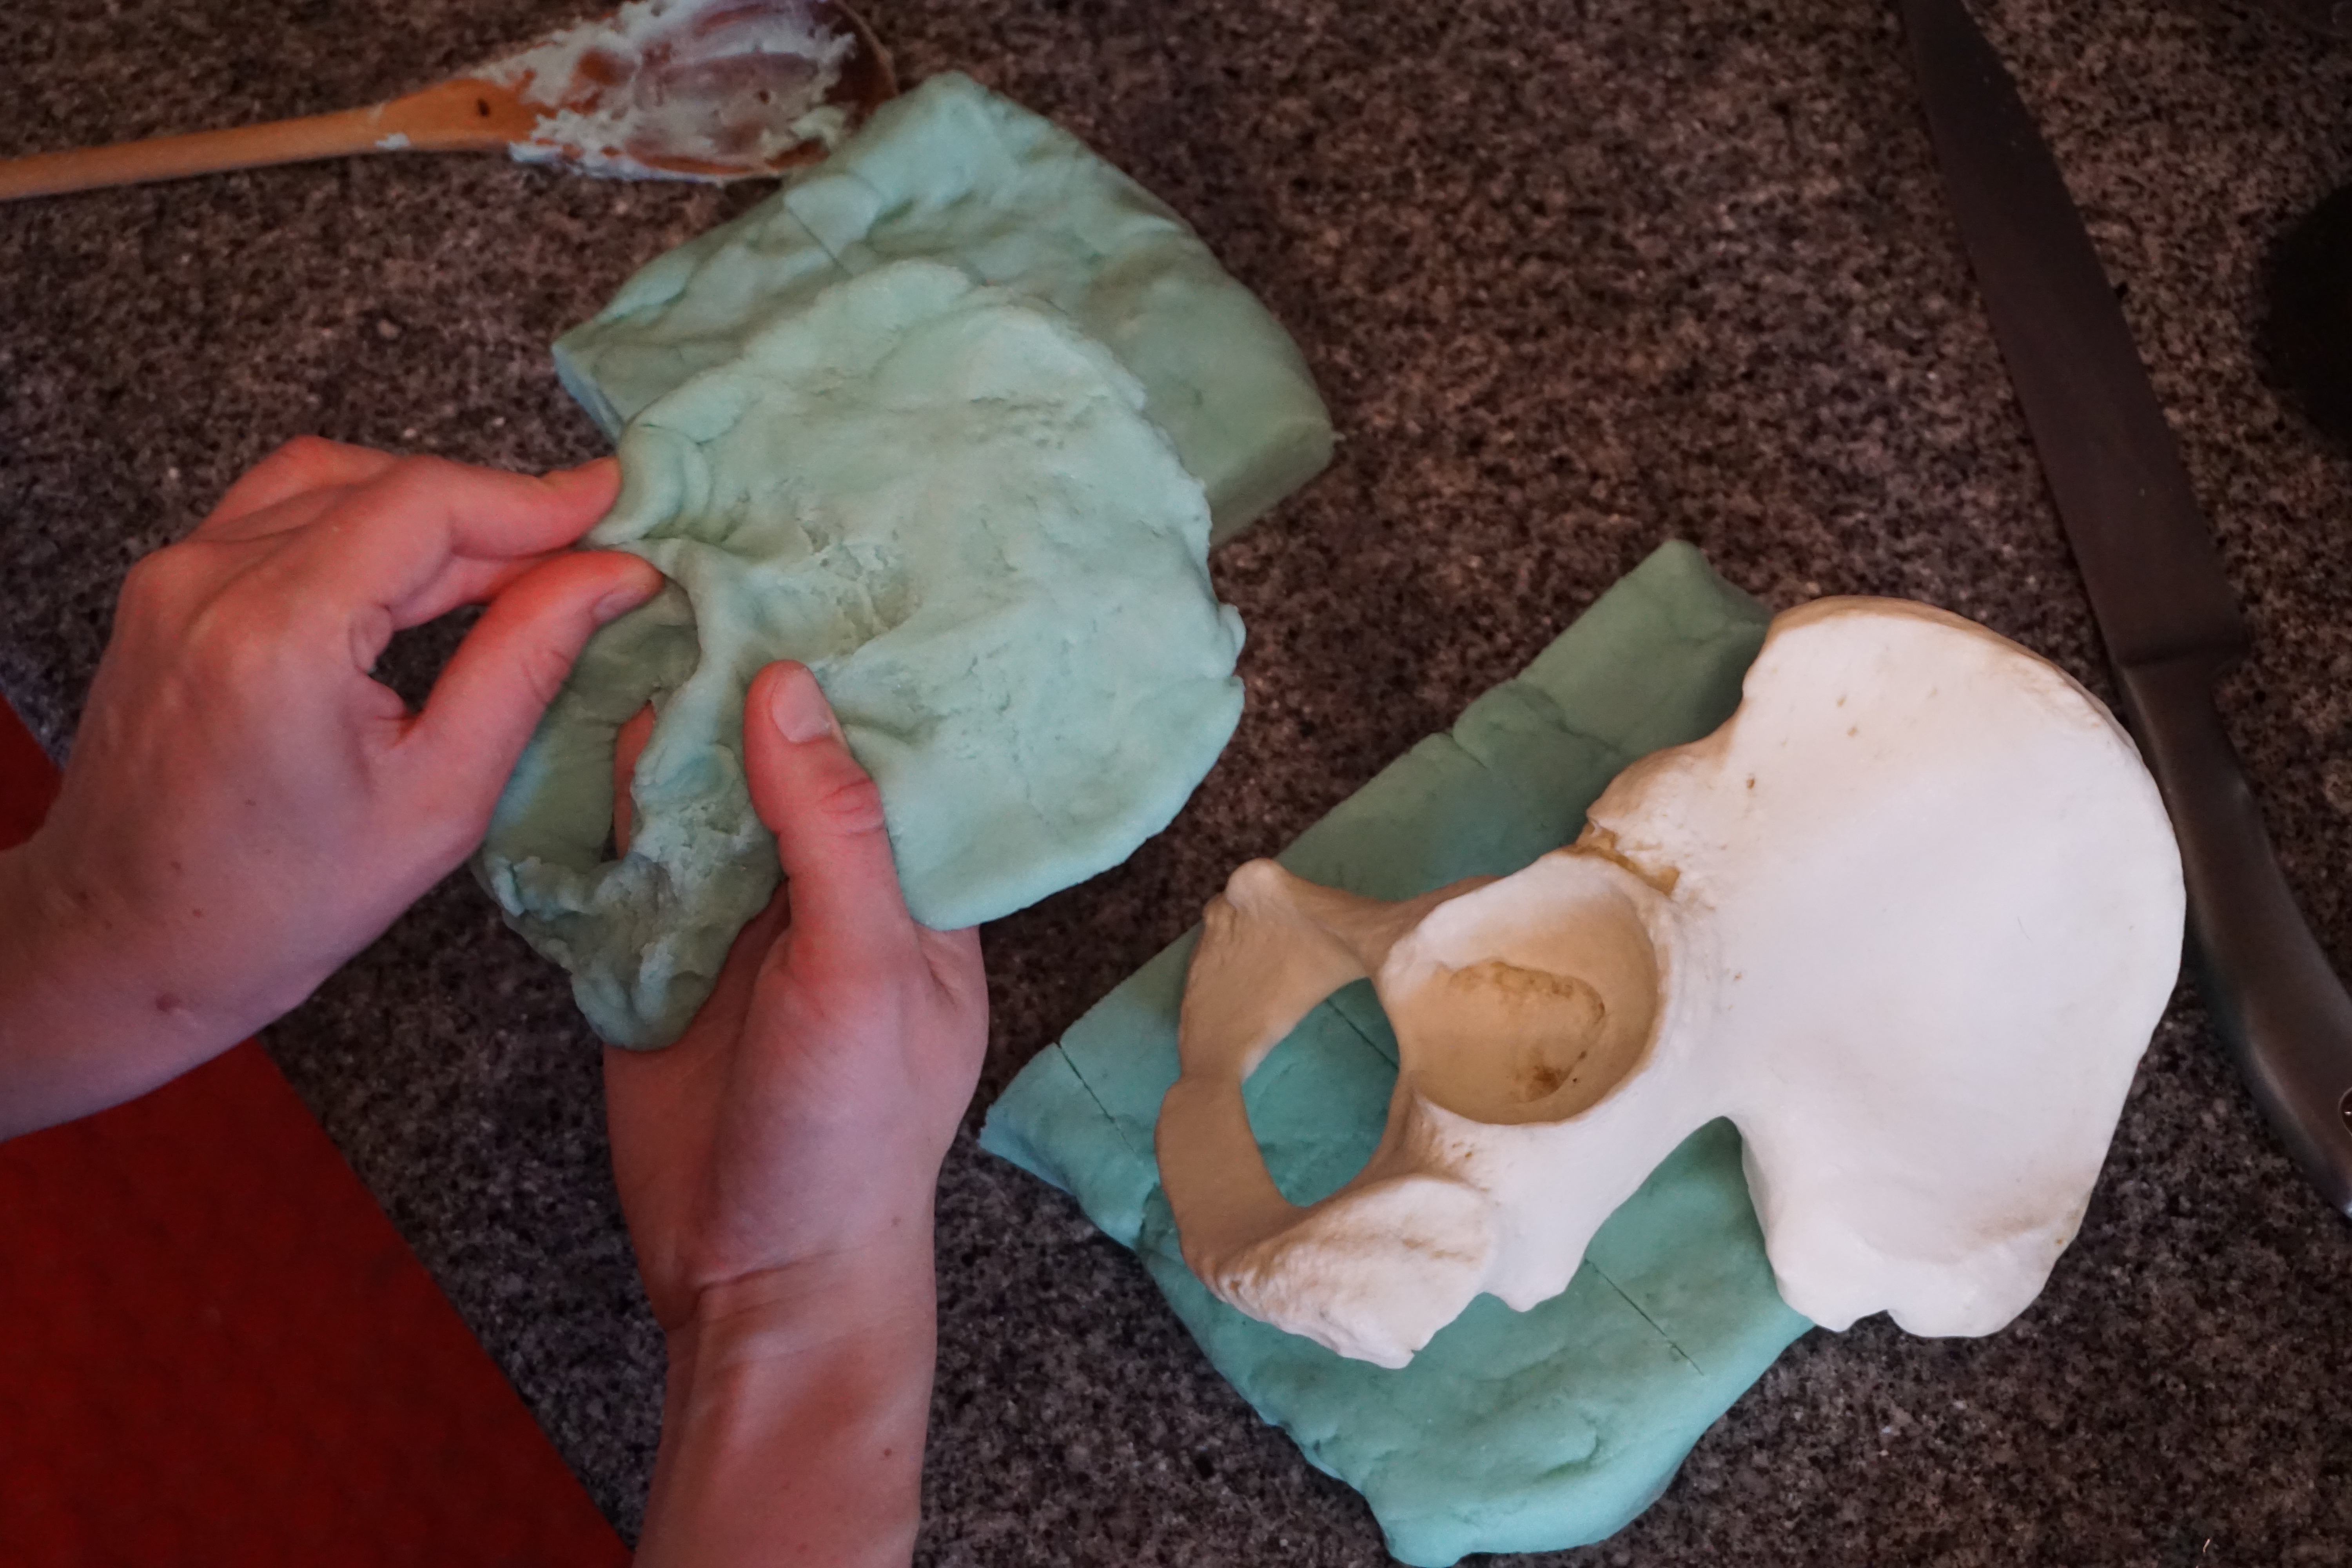
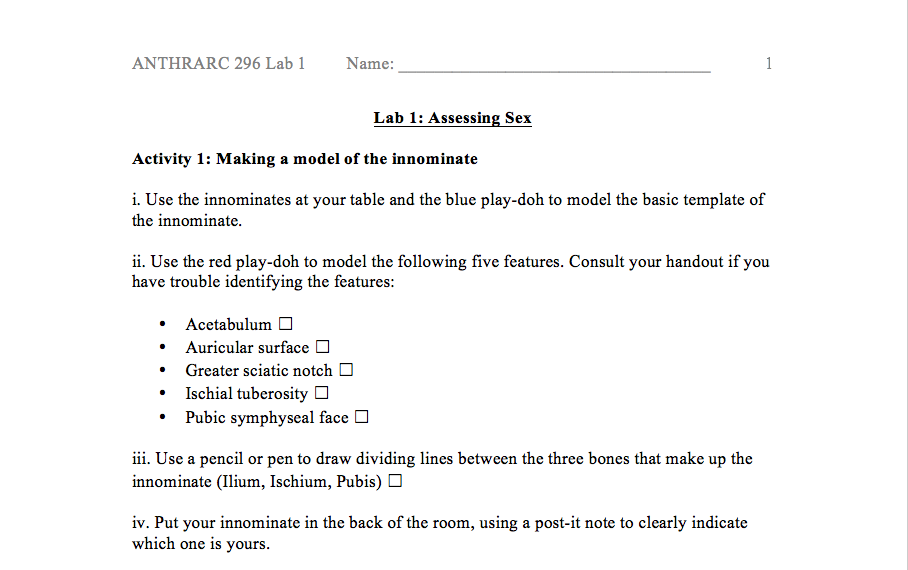
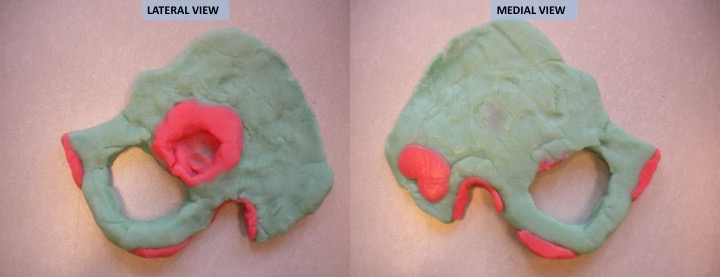
1. Making a model of the innominate: The ossa coxae can be some of the most difficult bones for novice osteologists to master, because their features are three-dimensional and tricky to orient. This summer I was teaching a bioarchaeology class, rather than an osteology class, so I needed a way to rapidly familiarize students with the structure of the bony pelvis so that they could learn how to estimate sex and confidently assess pelvic features. My solution to this dilemma was to have students craft a play-doh model of a single innominate, marking out specific features in red.
2. Reconstructing the subadult tibia…from memory: In this activity, I wanted students to internalize the anatomy of the structure of the subadult tibia as a means of firmly grasping the nature of primary and secondary centers of ossification. First, one of our lab activities entailed drawing a subadult tibia (with me making some heavy-handed hints about the importance of mastering its anatomy):
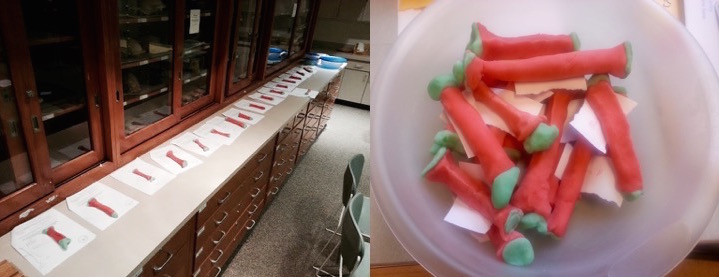
 Then, during the quiz the following week, the final question instructed students to craft their own model of a subadult tibia, delineating primary centers of ossification in red and secondary centers of ossification in blue. The students did quite well, with many getting the bonus points I awarded if they also correctly modelled the anterior tibial crest and medial malleolus.
 So there you have it – one hands-on strategy you can use to encourage students to engage with anatomy, without relying solely on sketching.
 Thanks are due to Stella for careful supervision of the play-doh making process, and to Z. Cofran for photographic documentation of the recipe.
Disclaimer: The beautiful kitchen pictured in the photo series is not, in fact, my own. In terms of both size and aesthetic appel, my real kitchen is basically a ship’s galley.


Pingback: Bone Broke Year in Review 2015 | Bone Broke