
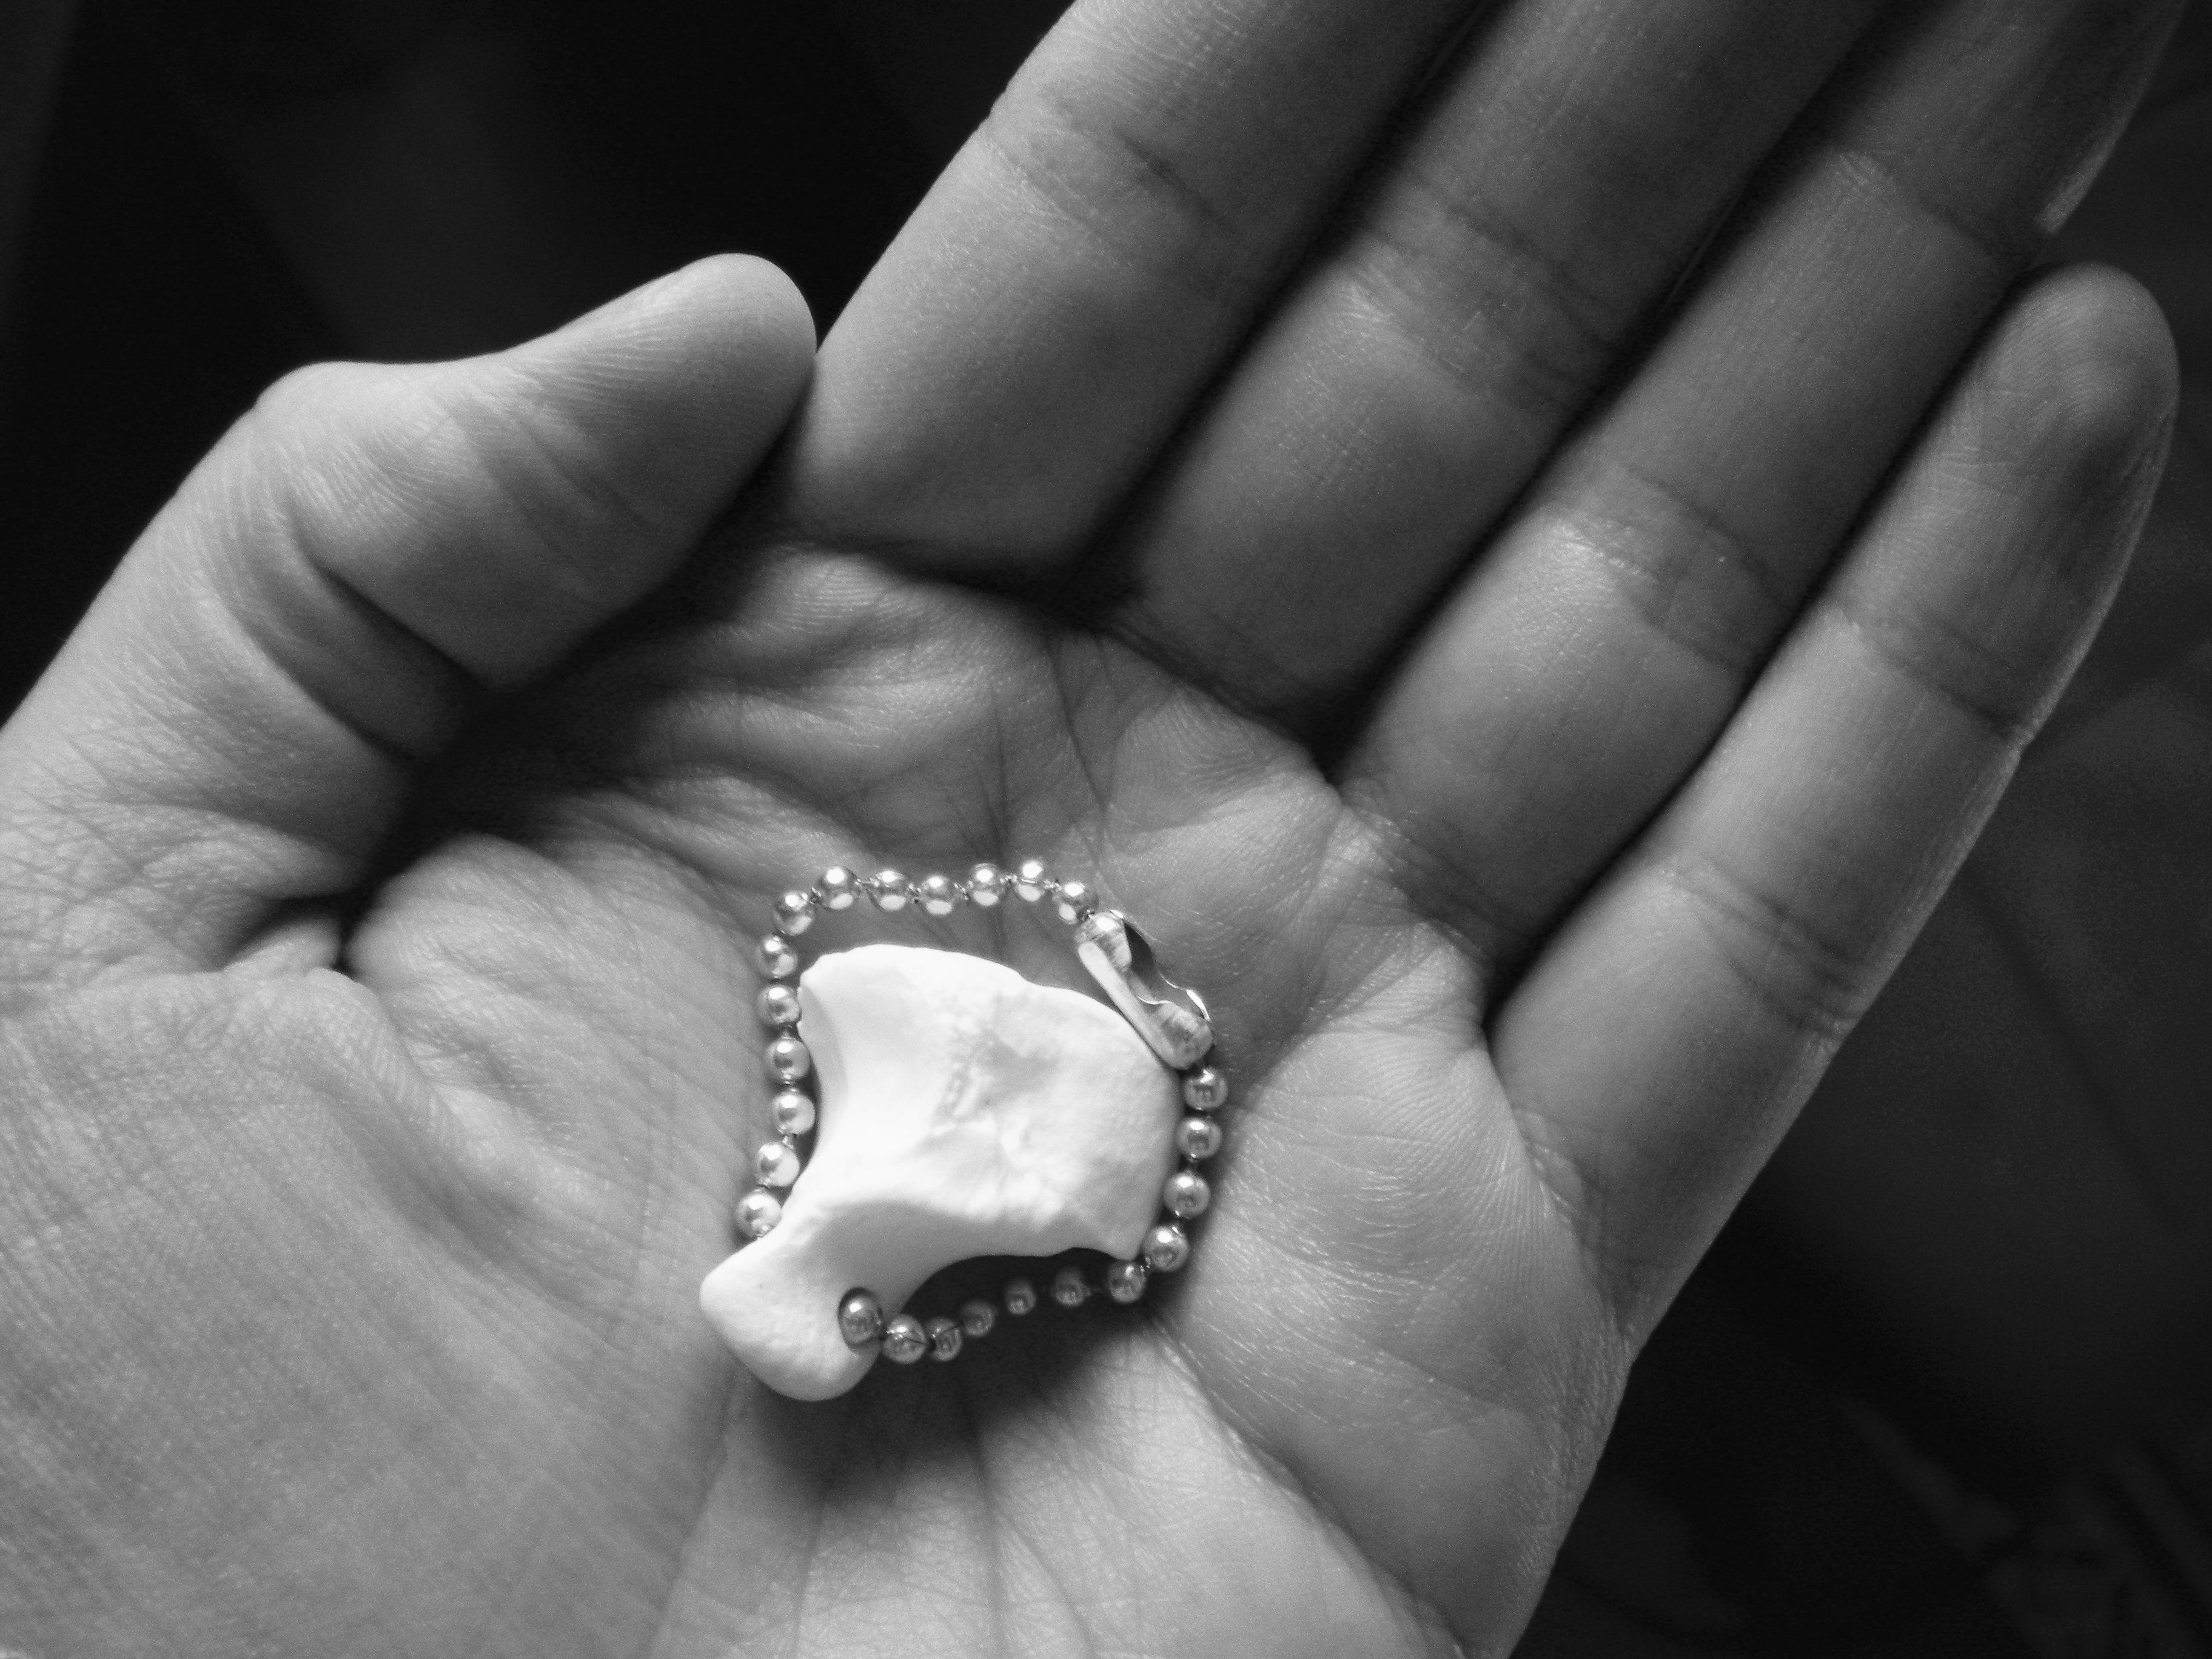
For the most part, I am a dependably frugal human – I pack my own lunch, I live with a roommate, and the average garment in my closet is curated for at least four years. However, when it comes to osteological replicas, all of my good sense flies out the window. Whenever I attend the American Association of Physical Anthropologists meetings, I treat myself to some small bone-related item. This year, I bought both a pair of osteologically-themed earrings, and a little carpal keychain that I’ve been carrying around like a totem for the past several weeks. In its honor, I’m devoting this post to learning how to identify and side the hamate.
I enjoy working with carpals because they’re each so distinctive in shape, so they’re hard to confuse for one another. However, it can be a little overwhelming to learn how to differentiate them and side them if you’re trying to learn all of the bones of the wrist at once. Accordingly, I find it easiest to proceed on a carpal by carpal basis.
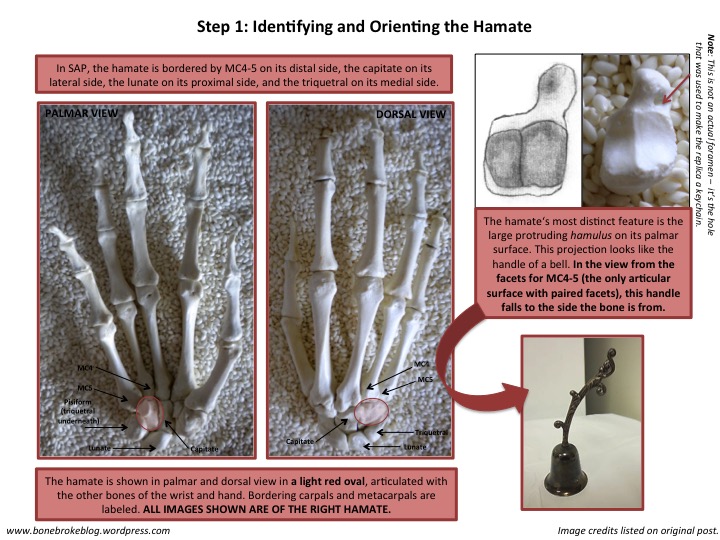
The first step is learning the overall shape of a particular carpal, and being able to recognize its most distinctive feature (hint: here it’s the hamulus). Importantly, all of the photos and drawings shown in the guide below are of the right hamate.
After you know you’re working with a hamate, examine the medial and lateral articular surfaces of the bone. These can be used to side the element. The process is particularly easy if you compare the element to a brachiosaurus:
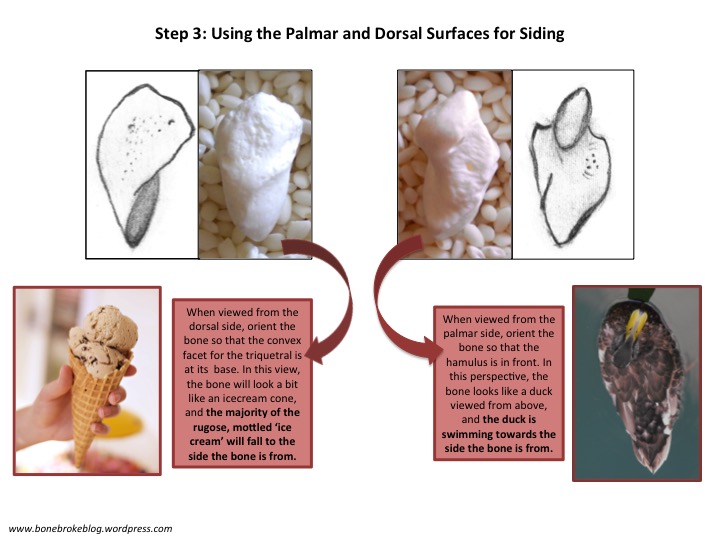
Finally, the palmar and dorsal surfaces of the hamate also have distinct features and orientations, which can be used to confirm your siding of the bone itself (though now you’ll be comparing the element to some of dinosaurs’ living descendants rather than dinosaurs themselves).
A pdf of this guide to identifying and siding the hamate is found below. I’ve included an extra page with my sketches of the hamate in labelled views, so that you can jot down some of your own strategies for identifying and siding the bone when in lab:
Bone Broke Guide to Identifying and Siding the Hamate
Image Credits: Bell found here, fat-bellied brachiosaurus from here, hollow-bellied brachiosuarus from here, brachiosaurus head from here, steps to the right from here, Duck from above found here, Ice cream in waffle cone found here. All other photos are of Bone Clones Magnetic Skeletal Hand and France Casting Hamate Keychain.

